Quick Guide: How to Generate SSH Keys on Windows 10 Easily
If you're working with remote servers, Git repositories, or cloud platforms, having an SSH key is essential for secure access. On Windows 10, generating an SSH key is straightforward thanks to built-in tools like PowerShell and the OpenSSH Client. Whether you're setting up a new server connection or securing your GitHub account, creating an SSH key only takes a few minutes.
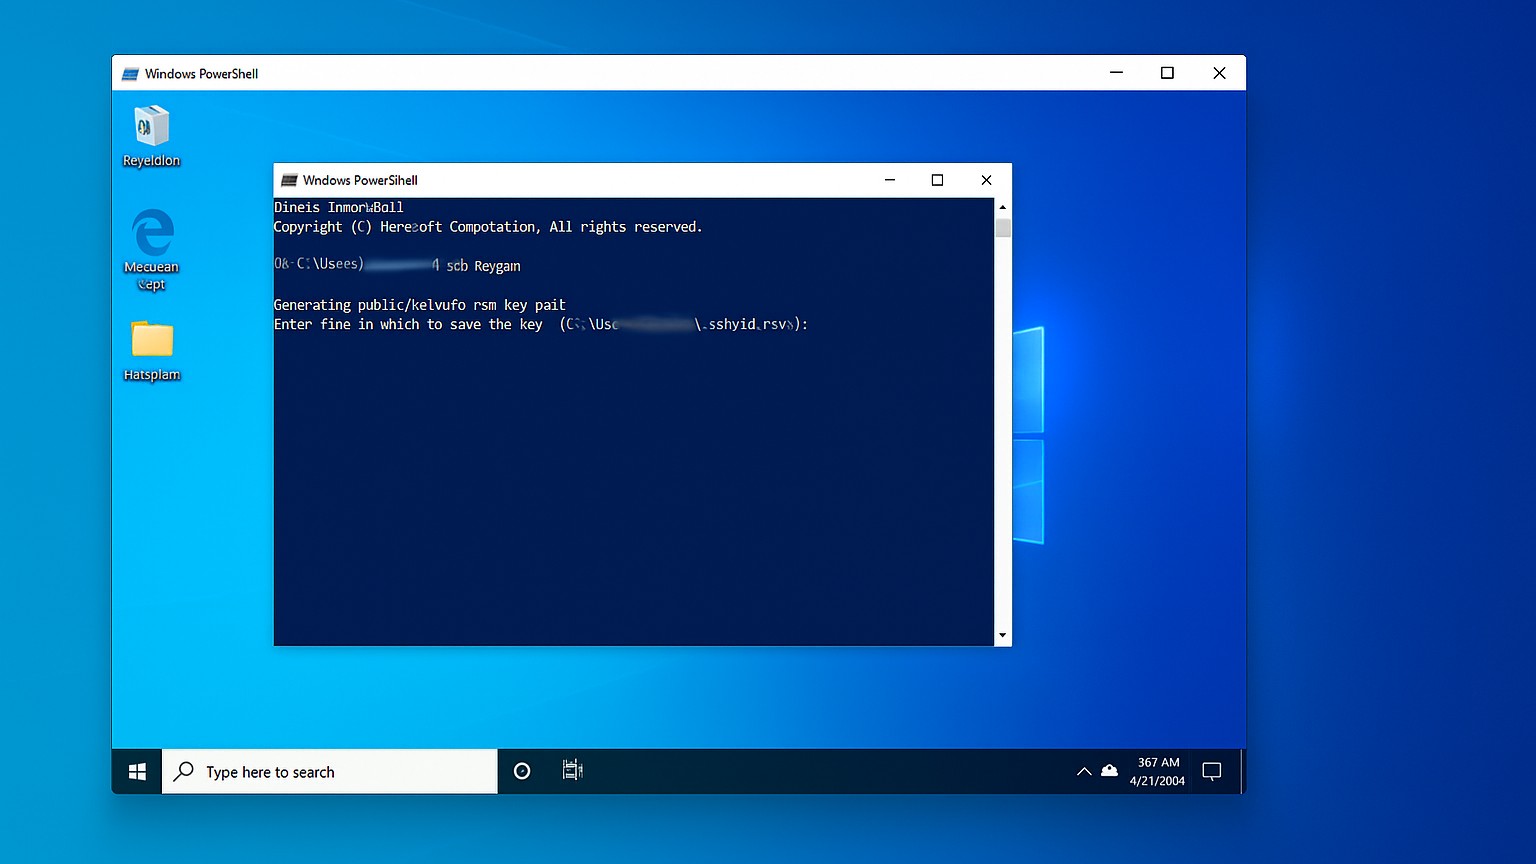
To get started, open PowerShell by pressing the Windows key, typing "PowerShell," and selecting it from the search results. Once PowerShell is open, check if OpenSSH is installed by typing ssh and pressing Enter; if you see a list of SSH options, you're ready to proceed, otherwise, you can install Openssh from the "Manage Optional Features" settings in Windows. After confirming that SSH is available, you can generate a key by typing the command ssh-keygen and pressing Enter, which will begin the key generation process.
When you run ssh-keygenYou'll be prompted to choose a file location to save your key pair; simply press Enter to accept the default location, usually under your user folder in .ssh\id_rsa. Next, you'll be asked to set a passphrase for additional security — you can either enter a secure passphrase or leave it blank for easier automated access. After completing these steps, your public and private SSH keys will be created and stored on your system.
Finally, you can view your newly created public key by running it cat ~/.ssh/id_rsa.pub in PowerShell and copying it wherever it needs to be used, such as adding it to your GitHub or remote server settings. With your SSH keys ready, you can now connect securely without needing to enter your password every time, making your development workflow smoother and more secure.
Creativity Meets Code.
Join our mailing list
© Copyright xklsv 2026. All Rights Reserved
xklsv